Welcome

This is a blog about the pursuits of Naturalist Alan Russo to incorporate all things Natural, especially Plants, into his daily life. Living close to Nature has always been a passion of mine and I try, with natures help, to live a Healthy lifestyle for myself and for the Earth.

Friday, November 24, 2023

Honey Locust Seed Pods


 I have, for a long time, known that the Seed Pods of the Honey Locust Tree were considered a Wild Edible. But I have never really spent much time learning that much about it.

 Honey Locust Trees are easy to identify because the trunk and the branches are covered in very intimidating thorns. Some of the thorns can be 3" in length. I remember, there was a school on LI that I did programs for once in a while that had a very scary Honey Locust Tree in the middle of the circle in the parking lot. I remember thinking how surprising it was that the school allowed the tree to be there because it looked so dangerous. I could picture a kid falling into or being thrown into the Tree and getting seriously hurt by the hundreds of long thorns protruding from the trunk. I was the thorniest tree I have seen even till this day.  There are also "thorn less" varieties which might throw you off a bit, like they did to me. For many years I thought I had Acacia trees on my property because there were very few thorns on the trunk and branches. The trees were young so they didn't produce any seed pods to help in the identification.

 Well, that all changed this year. Both the trees produced seeds, and I knew for sure I had Honey Locust trees. The seed pods are unmistakable. They are long, some 14", often twisted and turn brown when they are ripe. Unfortunately, buy the time the Pods are ripe the tree has lost it's Pinnately Compound Leaves so unless you have been paying attention to the tree all summer, the leaves won't help you at this point.

I know that there is a sweet gel inside the ripe Seed Pods but have I  have only tasted it a few times in the past when out on plant walks, just to show people it exists.
 In cross section, one edge of the seed pods is very thin and the other edge is thicker and squishier. It is in the thicker edge that there is a sweet gel that can be used as a sweetener.
It is not an easy task to open the long pods in one piece and I learned on the internet that some people soak their pods over night to help them open more easily. I took the pods and place them in a large pot and covered them with boiling water. Because they float, I placed another pot filled with water on top of them to hold them under water. The next day I experimented in ways to get the Gel out as it still was not that easy to split the pods in one piece. I settled on cutting the pods long ways just below the thick edges and just squeezed the gel out like a tube of toothpaste.
 I got about 2oz. of gel from all the pods worth processing. The gel is very sweet with a unique flavor. I made some Buckwheat/Spelt flour Muffins and used the gel to sweeten them and they came out delicious!
 The pods themselves are also edible but are very leathery and impossible to just eat as they are. Using a scissor, I cut the pods up into smaller pieces, put them on a tray, and place them in the toaster oven on 200deg. to dry them out till they were crispy.
Once they were dry, I put them in a blender to powder them but the blender only took them so far and they were too chunky and fibrous.
So I put them in a coffee grinder and they came out very fine with some fibers and small chunks so I sifted them through a fine strainer and got a really fine powder. The powder is very sweet and can be used as  sugar substitute. I put some in my oatmeal to test it out and it passed the test. Like I said, it has a unique flavor, so test it out before you put it in something important.
The fiber and unground debris that didn't go through the strainer, I added to a cup and poured some boiling water over it and made a "Tea" which was sweet and flavorful.
 I was very pleased with the results of this new Ethnobotanical Pursuit and will start collecting Honey Locust Seed Pods whenever I find them.
Peace 


Tuesday, September 15, 2020

Kousa Dogwood

 I know it's been many years since I wrote anything in this Blog. What can I say, sometimes Life gets in the way of Living. I also have felt I haven't had much new to say, thought I still sometimes teach about and still use Wild Edible and Medicinal Plants, I have not been spending too much time in front of the computer writing like I used to. Things change in life, and I am no different than most everyone else. The responsibilities of work, home and life in general often get in the way of what you want to do. Oh, the tangled web we weave!

Alright, enough about that, lets get down to it. I have had and known about Kousa Dogwood ( also called Korean. Japanese,and other names) for a long time. I have always admired it's beauty when in flower for a long time in my life. I have two Kousa on my property and have always thought the Fruits were very cool looking. With all my interest in Wild foods, I don't know why it never occurred to me that the Fruits might be edible or useful in some way. I don't remember when it happened, but I a couple of years ago I came across an article on the Kousa Dogwood and learned the Fruits were edible. My trees just happen to be in fruit at the time so I went out to test them, and boy were they good!

Of course I was very exited to learn of a new Edible on my property but also wondered why it took so long to learn this in my life. I have always thought of Kousa as an ornamental not a wild plant and generally I stay away from ornamental's. Many ornamental's are toxic and from foreign lands not to mention often come from a nursery and are heavily sprayed and toxic fertilized to keep them looking their best so people will buy them. Real Wild plants have always been my thing. I guess thats not really fair, it's not the plants fault for being an ornamental from a foreign land. A plant is a plant is a plant. Maybe I've learned a lesson, maybe not, but I will be more open to such discoveries in the future.

Kousa Dogwood in Bloom

 Once the flowers are fertilized, the fruits begin to grow. The immature fruits are green in color but turn yellow then red/orange when ripe.


Close up of Fruits at different stages of ripeness


The Fruit are a pretty orange color inside. Some of the Fruit have no seeds in them but there can be up to four (the most I have found) rock hard seeds the size of a tiny pea inside. You need to be careful biting into them as they can do damage to a tooth if not careful. I think the Fruits are delicious and I look forward to them every year. They are in fruit right now so this is the time of the year you can expect them to be ripe.

I decided to try to make something with the Fruit so I collected a bunch and brought them inside and de-stemmed them. My plan was to put them through a hand cranked food mill to separate the seeds but couldn't find mine so I put them in a food processor and pulsed a couple of time till the Fruit were slightly pureed but the seeds were still intact. I put the mush in a strainer and pushed the pulp through with a rubber spatula. this worked really well and all the seeds and the skin were filtered out and all I was left with was a beautiful orange pulp. I decided to make muffins so I took some rice flour, eggs and a touch of vanilla and mixed them into a batter and baked them till done.

They came out an orange color and were pretty good for a first try. You can use these fruits to make anything you would make with any other Fruit. Don't be afraid to try something new and have fun!
Peace

Saturday, January 2, 2016

What's Goin On?

  Christmas Day I was up early enough to watch the sunrise. I stepped out on my deck on this very warm morning and heard a symphony of Nature, a symphony way out of place for this time of the year. If I didn't know better I would have thought I was transported to the Springtime. The main players were the Spring Peepers, a loud background chorus to the singing of birds.
  We have been having some unseasonable weather for almost two weeks now and it hasn't stopped raining for at least ten days. This was the first morning in a long time I could actually see some color in the sky, which prompted me to go out and look at this rare site.Yesterday during a rare break in the rain, I walked around the property a bit and was surprised to see all the plants that were being fooled by the weather. My lawn is covered in purple Violet flowers! Dandelions are huge and blooming, the Daffodils are about ready to flower, the Forsythia have some blooms on them, Henbit and Purple Dead Nettle are blooming, and where I work, there are Azailia Flowers blooming!
  It's New Years Day and I was out mowing my lawn today, crazy! It did get cooler today and it didn't actually rain, though the sun never came out, so I was able to spend sometime outdoors doing chores. It's amazing how much it looks like Spring out there.
  I have this patch of Chickweed that I have been harvesting since the weather cooled down last month. I keep getting out there thinking this may be the last day I will get to harvest, expecting the weather to get cold and killing it off, but the patch keeps getting larger and larger and is spreading all over the front lawn.
  As crazy as this all is, I am getting a bunch of free food I normally wouldn't get this time of year so that's good. I just wonder what effect it will have on the plants when the real Spring comes around.
The chickweed counter at my local Nature market!
Peace, and happy Winter Solstice

Sunday, December 27, 2015

Pecan Harvest

 I  am a little reluctant, maybe even a little embarrassed, being all "mr. natural" and all, about posting the following post. I should probably explain what the heck I am talking about.
 It's Pecan season in NC and I have 5 large Pecan trees.Every 4 or 5 years or so I get a bumper crop. Last year I got almost no Pecans. Four trees produces nothing and one produced very few. I was a little worried. But this year there are more Pecans than I can comfortably collect on my own. The season is spread out and each tree seems to drop the bulk of the crop at different times, but it is still tedious work and with life getting in the way of living as it often does, I had to think of a way of getting as many as I could in the time allotted.When we moved into our house we found these two "tools" hanging in the car port. I really had no idea what they were and eventually I did go online to try to find them. They were nut picker-up-ers. It turned out it was easier and more efficient to crawl around on the ground and pull a wagon behind me than to use these tools. So I started thinking, (scary I know), how can I harvest all these Pecans more efficiently.
 After walking around the trees bending over every 2.5 seconds to pick up a Pecan, eureka!, it dawns on me what to do. I can suck them up with my shop vac! Not very Primitive Technology, but I bet it will work. I cleaned out my shop vac and started to try it. If you have ever used a shop vac, you know that as you are pulling from place to place and you hit something, even if it as small as an amoeba, the shop vac will fall over. Well, you can imagine how well it worked out on the grass. Again the thinking cap went on. Eureka! I can lash it to my hand truck and pull it around that way.
My not so primitive Pecan Picker -Upper
 It worked way better than I thought it would! Of course I felt a little guilty, like I modernized a sacred act or something, but got over it real quick as I picked up a full 16 gallon shop vacs worth in a half hour!
Sucking up Pecans the modern lazy way.

I got three of these full before I called it a day

 Of course when you do it this way you pick up a lot more than Pecans. The hulls, the leaves, the leaf stem and anything else loose on the ground. So, Now I have got to figure out a way to separate all the "junk' from the Pecans. I started to think of ideas and thought using science would help as it has in the past.: http://ethnobotanist128.blogspot.com/2014/02/chufa.html . Well it didn't work, everything, including the nuts floated.

Everything Floats!
It just so happens the day I did all this it was pretty windy, I thought, maybe I can redeem my Primitive self by using the tried and true method of winnowing. I put a large box into a lawn cart and started dropping the Pecans and debris slowly over the box. It worked pretty well and left a debris trail several feet long with things sorted by weight from heavy in the front to the lightest stuff going the farthest.
Dropping

Debris Field

 After about a 4 Eureka!day I had a huge box of Pecans and this is just day one. I have done the same thing a few more times since then and now have a hefty supply of Pecans for me and my chickens for the winter and beyond. Funny, I invited several people to come and pick Pecans to their hearts content, but no one has taken me up on the offer, but all said if you have any extra I will take them off your hands.Yea Right!
Peace


Sunday, September 6, 2015

Teasel Update #2


Well, the Teasels have come to their end. They are dried up and all brown. Though this is the reason I planted them in the first place, it is sad to see them go.
 Now comes the fun part, harvesting the seeds. When they first turned brown I tried to get some seeds but only a few came out. I was disappointed thinking they just didn't produce as I thought they would. I decided to just leave the plants be and see what happens. A couple of weeks later while I was mowing around my garden I banged into one of the plants that had drooped over the lawn and my mower literately got covered in seeds! I got very excited and when I was done mowing I grabbed a bucket to see what I could collect. I bent over some plants into the bucket and banged them against the side and got a ton of seeds.
 I am very happy with the amount of seeds I collected, but of course I have way more than I need if you are interested in growing Teasel I have some seed available here: http://ethnobotanist128.blogspot.com/p/blog-page.html
 I have already tested the seed and it looks like every one sprouted ( they are too small to count). If you are interested in growing some get some seed here: http://ethnobotanist128.blogspot.com/p/blog-page.html .
 The other cool thing about Teasel is, once you collect the seed, you have these really cool dried flower stalks to use in arrangements or other crafts.
Peace


Saturday, September 5, 2015

It's Sumac Time Again!

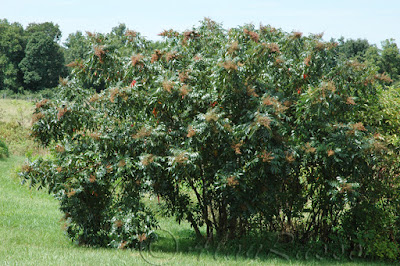
 The days are getting shorter, the mornings cooler, but the heat is still upon us. I can see signs of Fall everywhere I look. Things are defiantly winding down (except my lawn won't stop growing!) This is Sumac season in my part of North Carolina.
 I have two large "Winged" Sumac on my property. One I planted myself from a plant that started growing right next to my propane tank. I let them grow because I love the way Sumac looks in the Fall with the red berries and the red leaves, not to mention how useful they are. Plus, that one plant hides my ugly propane tank! Most people consider them weeds and have no problem poisoning their homes and our water supply to get rid of them.
 I have written on making Sumac Aide before, http://ethnobotanist128.blogspot.com/2011/09/sumac-aide.html so I am not going to go into detail on making Sumac Aide again, so check out the previous post if you have never made it before. This is just a reminder to get out there and collect your berries before all the good stuff is washed away by a late summer rain!

Winged Sumac Drupes

The "Wings"
Berries covered in Malic Acid
Soaking the Berries to dissolve the Malic Acid
Sumac Aide!
Other types of Sumac make a much redder drink than my Sumac does. If you use Staghorn Sumac Berries, be sure to strain out the tiny hairs through a tea strainer or they may irritate your throat. For those who are thinking about all the other stuff that might be in your drink, insects, bacteria etc., once you have your drink made you can now boil it to kill anything if you like. I just drink it as is most of the time but I boiled it this time so I could seal it in Mason Jars to keep it longer. Also heating it and drinking it as a tea with a little Honey is delicious! 
 As always, be sure to identify your plants correctly. There are many plants in the Fall that have red berries so be careful. Also, Sumac is very common along roadside transition zones and in drainage ditches, stay far away from these toxic environments when you collect.
Peace

Wednesday, August 12, 2015

The Elderberry Experiment

 This year I had a plentiful crop of Elder Berries. I made more tincture
( http://ethnobotanist128.blogspot.com/2011/08/elder-berries.html ) than I hope I will need this winter. So, what to do with the rest of the berries?
 I have been interested in Lacto- Fermentation and Wild fermentation for a while now though I don't do as much of it as I should. Fermenting vegetables helps bring healthy probiotics into your diet and helps preserve edibles for a longer shelf life. I got a ton of Cucumbers this year and of course they came all at once. I pickled some in organic apple cider vinegar for long term storage but Lacto-fermented the rest.
 I have a great book called Wild Fermentation that I have used in the past to make Vinegar out of the skins of organic Pineapple and the scraps of other fruits. The vinegars came out great with almost no effort on my part, the wonderful world of microbes floating through the air did all the work.
 So, this light goes off in my head, 'how about making vinegar out of the extra Elder Berries'! I figured I would kill two birds with one stone. I would get some unique vinegar and I would get the medicinal value of the Elderberries every time I used it. People who can't use alcohol for one reason or another make Medicinal Tinctures out of Vinegar. So rather than soaking the berries in vinegar why not make vinegar directly from the berries!
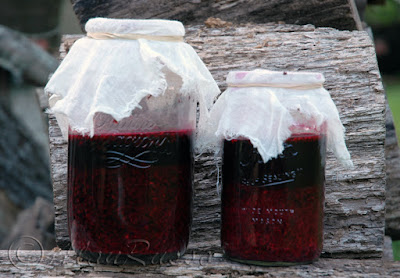
 I went to the Wild Fermentation book to refresh my memory on the procedure as it has been awhile since I have made Vinegar. I proceeded to smash up the Elder Berries in a bowl than added them to a couple of mason jars. Next I made the sugar solution., 1/4 cup organic sugar to a quart of water. I added the organic sugar solution to the berries being sure to cover them with the solution. Next, I simply cover the jar with cheese cloth and let sit on the kitchen counter, stirring every so often, for as long as it takes to get vinegar.

This batch took about 2 weeks to get acidic enough to strain out the berries. Once the berries were strained out, I placed the vinegar in an old milk bottle with a plastic cover so the acid doesn't eat away at a metal top.

From my experience in previous vinegar making, the longer it sits, the clearer the liquid will become.
 So, you are wondering how it tastes! Well, I have to admit it isn't the best vinegar I have made. If you have ever tasted ripe Elder Berries you know they have a weird almost nauseating taste to them. Drying them helps the taste a bit but they are not berries you can eat a handful of and want to come back for more. The vinegar has a slight hint if that aftertaste. I wonder if it would help if the vinegar was made from dried berries instead. Luckily I love sour stuff and respect the berries for their medicinal value. I can't wait to try it in some in a salad dressing.
Peace

Sunday, August 9, 2015

A Lesson Learned

  As I usually do, last year I saved certain seeds from my garden.. I grew Melons of different kinds and cucumbers of different kinds saving the seeds so I wouldn't have to buy them again this year. Some of the things I saved were the seeds of Armenian Cucumbers and seeds from the Musk Melons.
  I planted the Cucumbers on a fence this year, the best thing I have ever done, saving lots of space and making it easier to harvest the cucumbers overall. The vines did really well and as the fruits started to come out I started to see what looked like Musk Melons growing where I planted the Armenian Cucumbers. Thinking I just mixed up the seeds, I thought "fine I will just have more Melons than I planned". As the "Melons" continued to grow, they began to get extremely elongated which baffled me as I had not planted these nor had I ever seen anything like them before. They looked like Musk Melons but were very long and skinny. I let them grow just to see what they would turn out to be but they just kept growing.
  I started to suspect there was some hybridization going on here so I started to research. Turns out that melons will cross pollinate with each other. The cross pollination actually happened last year and the seeds I planted were already destined to become a mix. But wait! Melons and Cucumbers don't cross pollinate so whats going on here! As I learned last year, Armenian Cucumbers are not really cucumbers, they are Melons! They are used more like a cucumber would be used, as they are hard and crunchy, than used as a Melon would be used. They can be used in salads or sauteed or pickled as a cucumber would.
  If left on the vine to ripen the hybrid will turn yellow and slip from the stem as a Musk Melon would but the flesh is not as orange or sweet as a Musk Melon is. You can definitely see and taste the influence of the Armenian Cucumber on this Hybrid. All in all they are not a bad thing to eat and they get huge so you have plenty of food. They go good in a fruit salad or a cucumber salad and are not bad eaten alone.
 The lesson? Don't grow different kinds of Melon right next to each other unless you are doing some genetics experiments!

Ripe Musk Melon

Armenian "Cucumber"
Hybrid Armuskian Cumelon!

Sunday, June 21, 2015

Teasel Update

 What a difference a season can make! The changes in my Teasel plants are amazing since I first posted about them in January ( http://ethnobotanist128.blogspot.com/2015/01/teasel-root.html ) If you check out the photos in the last post you can see the mat of dense scraggly winter burned plants that were no taller than 6"tall. They stayed that way through the rest of the winter and I often wondered whether they were going to survive because of the way they looked.
 As the days started to get noticeably longer and some warmer weather started to move in I started to notice a growth spurt and it seemed over night they grew about a foot taller and they just kept going from there. It is now June and they are taller than me and in bloom! I cant wait to collect the seeds and the dried flower stalks.

As the Teasel just began to get flower heads, they were as tall as my shoulder.
The flower heads just appearing
The leaves are opposite, sessile and clasping on a very prickly stalk.
Many of the leaves formed small wells where puddles gathered after the rain.
By the time the flowers began opening, the plants were over a foot above my head ( I am 5'8")
At first, the flower heads showed a slight purple ring around the center.
 That purple ring bloomed into the first flowers


Some Bloomed in two rows


Closeup of the flowers

To be continued!

Sunday, May 31, 2015

Some Dandelion Fun

 Recently a friend asked if I could make her some Dandelion Tincture. I said "no problem" as I have lots of Dandelions growing in my, -garden to be- area. When I went out to harvest the Dandelions, there were some huge ones with lots of flowers on them. I hated to see those flowers go to waste so I picked them for lunch. I decided to make some Dandelion Fritters. I also thought I would try to make them with Coconut Flour rather than Spelt as I would normally do.
 Working with Coconut Flour can be tricky as it has no gluten to hold it together like wheat or spelt flour would. So I experimented. I had to add a lot of extra eggs to hold the batter together and a lot of extra coconut milk because the flour seems to have an insatiable thirst for liquids.I added some baking powder, some salt and gave it a shot in a hot oiled cast iron pan. It broke apart and didn't stick to the Flowers! Dag nabbit! I added more eggs and a little more flour thinking the batter was to liquidy. It seemed to work pretty well so I did the whole batch.
Dandelion Lunch!
As you can see they came out pretty good, well, good enough to eat anyway. I don't have a real recipe as I tweeked this one so many times, but I'm sure you can find a batter recipe somewhere online from someone who is better versed in the ways of Coconut Flour than myself.
 When I harvested the plants, I noticed there were lots of flower buds deep in the plant as I broke it apart to clean it. I decided to not let those go to waste either, so I harvested them, put them in a small mason jar and poured hot homemade pickle brine over them and sealed the jar. I now have Dandelion "Capers" to use in place of real Capers when I need them.
Flower Buds Ready For the Brine